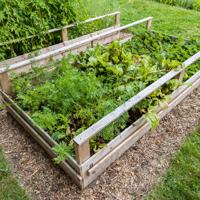
Building a walipini, or underground greenhouse, is an innovative and cost-effective way to extend your growing season. This guide outlines how to construct a walipini for around $300, allowing you to harvest garden-fresh produce year-round, even in harsh climates.
Understanding the Walipini Concept
The term “walipini” originates from the Aymara language of the Andean people, meaning “place of warmth.” The concept involves utilizing the earth’s natural insulation by digging into the ground and using passive solar energy to sustain plant growth. This technique is perfect for homesteaders aiming for self-sufficiency.
Choosing the Right Location
Choosing the right spot for your underground greenhouse is crucial. Look for a north-facing slope with plenty of sunlight exposure—ideally, an area that gets about 6 to 8 hours of sunlight a day. Avoid low-lying areas prone to flooding.
Essential Materials and Tools
- Tools: Shovel, pickaxe, post-hole digger, hammer, saw.
- Materials:
- Heavy-duty plastic sheeting
- Lumber (treated or naturally rot-resistant)
- PVC pipes
- Fasteners and hinges
- Rocks, stones, or bricks for foundational support

Steps to Building the Walipini
1. Excavating the Site
Begin by excavating a space around 6 to 8 feet deep. The length and width depend on your available space and needs, but commonly, walipinis range about 20 by 74 feet. Maintain straight walls and a slight slope towards the back for drainage.
2. Constructing the Frame
Build a sturdy wooden frame with treated lumber. The frame will support the roof and cover structure. Assemble your frame directly in the pit you’ve excavated.
3. Installing the Roof
Cover the frame with heavy-duty plastic sheeting, which acts as a solar energy collector. Secure the plastic using PVC pipes to create curved support over the frame. Popular Mechanics provides tips on using PVC in greenhouse construction.
4. Insulating and Waterproofing
Line the dug-out walls with stones or bricks to prevent soil erosion and provide added insulation. Proper waterproofing is necessary to avoid water seepage, so ensure the plastic sheeting extends beyond the edges of the walls.
5. Ventilation and Temperature Control
Ventilation is vital to regulate temperature and ensure air circulation. Consider installing simple vents or skylight-style openings that can be manually opened. You could use old windows for this purpose, as they are often inexpensive at salvage yards.
6. Soil and Planting
Adding organic-rich soil is essential for healthy plant growth. To ensure the soil is fertile, consider mixing it with compost or aged manure. Plant cold-hardy crops like kale or spinach during cooler months and warm-season crops like tomatoes in the summer.
7. Maintenance
Regular maintenance involves checking for any damage to the plastic sheeting, ensuring frames and walls remain intact, and monitoring plant health. Simple debris removal procedures will go a long way in keeping your walipini functional for years.
Benefits and Considerations
Using an underground greenhouse like a walipini offers numerous benefits, including reduced heating costs and the ability to grow a diverse range of plants in nearly any climate. However, it’s essential to be mindful of potential pitfalls like water drainage issues. For further reference, Mother Earth News provides more insights into walipini gardening.
Building an underground greenhouse requires effort and patience, but for those keen on sustainable living, it’s a rewarding endeavor that pays back with fresh food and reduced dependency on external resources—all year long.